OXID
Setup
Once you have got your Makaira account you need to connect your OXID shop with Makaira.
To make this as smooth as possible we provide several modules depending on your shop version.
Please choose from the table of contents on the right side which OXID version you are using and you will get dedicated instructions.
OXID 6.5 & 7.x
Since OXID 6.5 there exists a default integration of the OXID Connect Essential module which is intended to provide a basic connection between Makaira and OXID, it synchronizes product data which then could be used with the headless Makaira Storefront. In this scenario you do not need to install anything, just navigate to your OXID backend and enable the OXID Connect Essential module.
If you're using OXID 6.5 and do not want to follow the headless approach and use Makaira functionalities within OXID install the Makaira Connect with the following command. ⚠️This works ONLY with OXID 6.5, since OXID 7 we strongly promote the headless approach.
composer require --update-no-dev makaira/oxid-connect:^4.0After the successful installation, the Makaira Connect module is available in the OXID backend and you can continue with the configuration.
Please keep in mind that you should enable only one Module either Makaira Connect Essential or Makaira Connect .
OXID 6.4
For the newest OXID editions you only need to run the following composer command.
After the successful installation, the module is available in the OXID backend and you can continue with the configuration.
composer require makaira/oxid-connect:^3.0OXID 6.2 - 6.3
For those OXID series, you need to run the following composer commands to install the connect module and a compatibility module.
After the successful installation, the module is available in the OXID backend and you can continue with the configuration.
composer require makaira/oxid-connect:^2.0OXID 6.1
For those OXID series, you need to run the following composer commands to install the connect module and a compatibility module.
After the successful installation, the module is available in the OXID backend and you can continue with the configuration.
composer require makaira/oxid-connect:^2.0
composer require makaira/oxid-connect-compat
OXID <6.0
For OXID series below version 6 you need to adjust the composer.json to match the snippet given below.
{
  "require": {
    "makaira/oxid-connect": "^2.0",
    "makaira/oxid-connect-compat": "^2.0"
  },
  "scripts": {
    "pre-install-cmd": ["mkdir -p <SHOP-ROOT>/modules/makaira/", "touch <SHOP-ROOT>/modules/makaira/vendormetadata.php"],
    "pre-update-cmd": ["mkdir -p <SHOP-ROOT>/modules/makaira/", "touch <SHOP-ROOT>/modules/makaira/vendormetadata.php"],
    "post-install-cmd": ["test -d <SHOP-ROOT>/modules/makaira/connect || cp -r vendor/makaira/oxid-connect <SHOP-ROOT>/modules/makaira/connect"],
    "post-update-cmd": ["test -d <SHOP-ROOT>/modules/makaira/connect || cp -r vendor/makaira/oxid-connect <SHOP-ROOT>/modules/makaira/connect"]
  }
}
After you replaced the <SHOP-ROOT> according to your setup (for OXID 6.x replace <SHOP-ROOT> with source) you can run composer.
composer update --no-devAfter installing the module, you need to add a simple code snippet to bootstrap.php of your OXID shop. Before the line containing require_once OX_BASE_PATH . 'modules/functions.php';, insert the following snippet (If necessary, the path to the vendor directory must be adjusted.):
require_once __DIR__ . '/../vendor/autoload.php';After the successful installation, the module is available in the OXID backend and you can continue with the configuration.
Basic module configuration
All relevant information to configure the module can be found in your Makaira instance
(<SUBDOMAIN>.makaira.io/#/install) or by navigation to "Profile Screen" -> "Installation".
Param | Description |
|---|---|
Secret | The secret is used to connect with the Makaira API and to secure the module endpoint. |
URL | URL of your Makaira instance to make use of the API |
Load limitations | With the load limitation you can control when your system is flagged with 'under high load'. Set the threshold of your 5 minute average load. Per CPU core you can add 0.5. If the average load is above your threshold, the import will be throttled. This avoids overloading our system at Makaira. |
Instance | The Makaira instance you want to connect with your shop. |

Basic settings
Initial data import
The data synchronization relies on revisions which are hold in a separate database. To set the initial revision you need to initialize the data by running the following command. Please choose the command depending on your OXID version an execute it.
php vendor/bin/oe-console makaira:touch-allphp vendor/bin/console makaira:touch-allphp vendor/makaira/oxid-connect-compat/bin/makaira-connect makaira:touch-allAll data will be marked as new and pulled with the next import by your Makaira instance.
Configure functionalities
Makaira offers many services and it's up to you which ones you want to use in your system.
Service | Description |
|---|---|
Use for search | Makaira is used as full-blown search engine within OXID. |
Use for categories | Category management is done in Makaira and rendered in OXID. |
Top category contains all products of the subcategories | Describes how your categories are set up. |
ID of the category tree filter in Makaira (if available) | Enter the ID of the category filter, which is configured in Makaira. This is needed for the correct assignment of categories. |
Generate SEO URLs for filtered categories and manufacturer pages | Use Makaira's algorithm to generate SEO URLs when a filter is used on top of categories or manufacturer pages. |
Import attributes & fields | Define individually which fields of the products, categories or manufacturers should be exluded from the import. In addition, you can specify which attribute fields should be interpreted by Makaira as integer or float, for example, to use them for a range slider. It is important that no typecast from another format takes place here. The correct format of the attributes must be maintained before. Please use the name of the database column for fields and OXIDs for the attributes. Each line can hold one value. ℹ️ There is a default list of excluded import fields. These fields are not used by most customers. If you notice that a field is not present, you should check this list first. |
Name of the URL parameters used for filters | Define the name of the filter parameter, which is used in the search URL. By default it is set to: |
Personalization
Beside the built-in personalization you are able to use Econda or Odoscope to sort the search result. Enter the credentials accordingly.
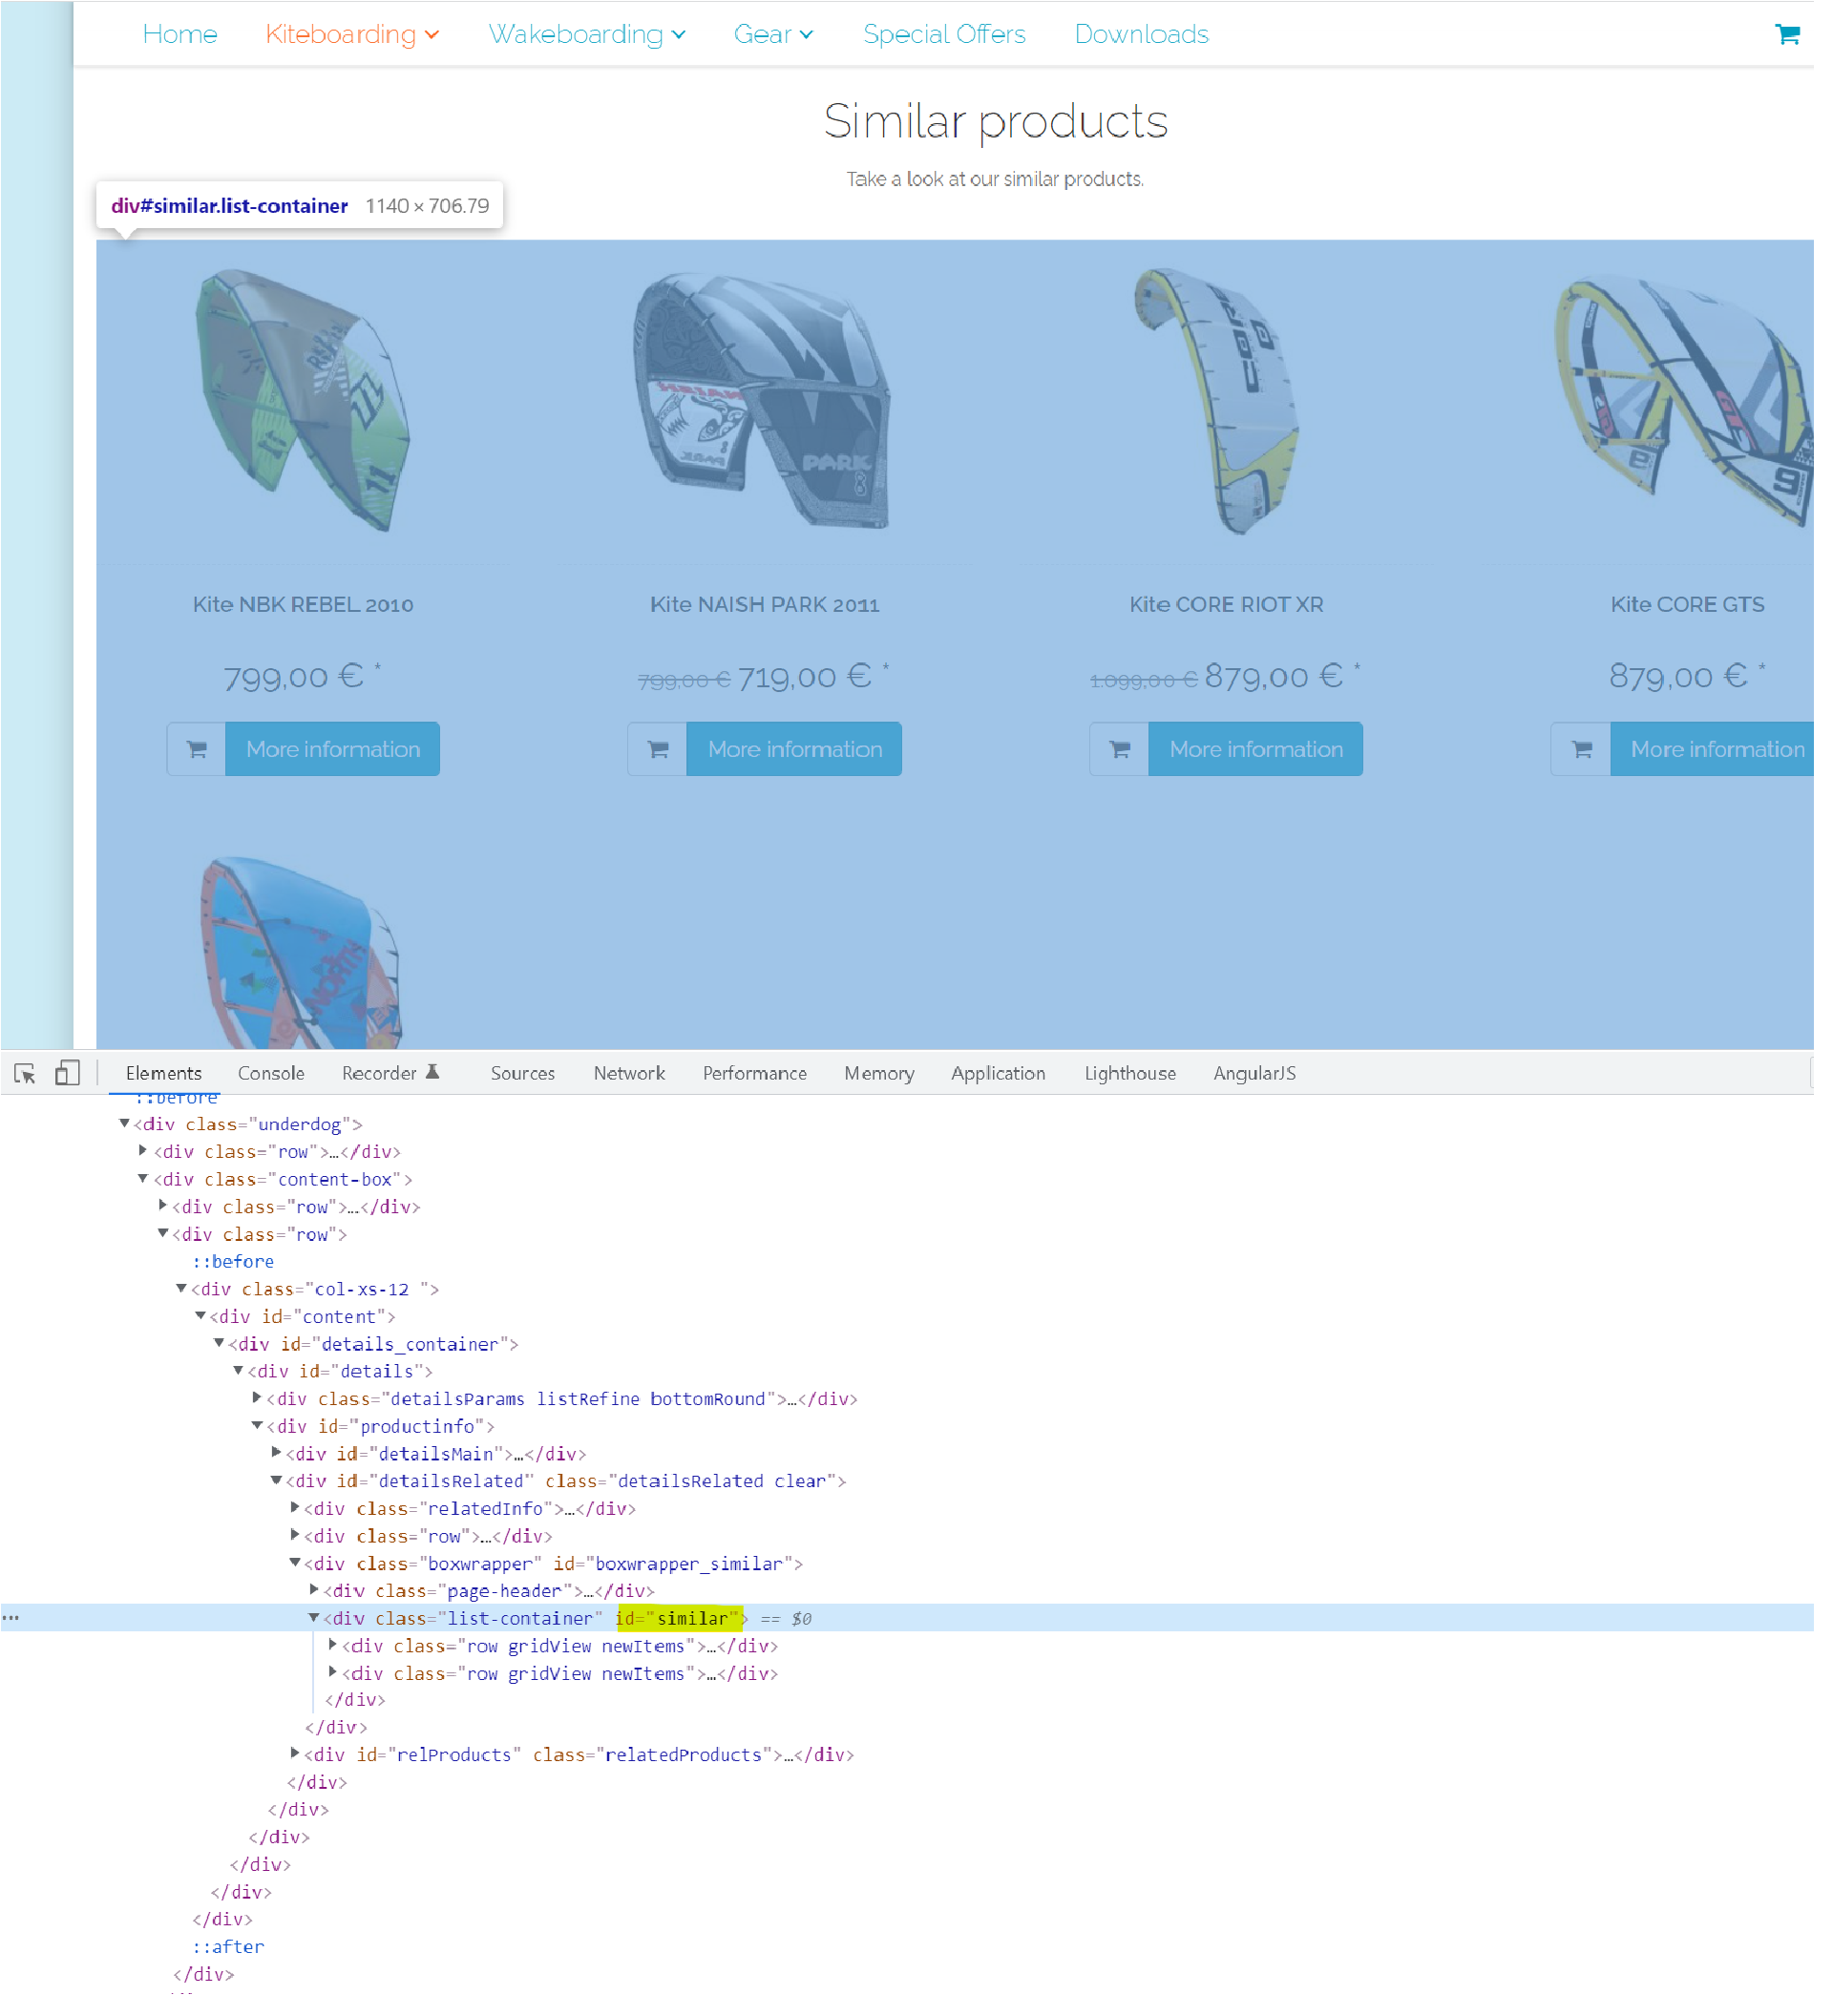
Recommendations
You can enable the Makaira based recommendations for accessories, cross-selling, and similar products. As soon as you enabled them, the recommendations are taken from Makaira and rendered into the given identifier (see image below for similar products).
Searchresults
To improve the performance for the autosuggest, you can set the amount of delivered records. Just set the number per type you want to receive.( -1 means no limit)
A/B-Experiments
By default the experiment is driven by Makaira internally. In some cases it makes sense to overdrive this behavior and then you can control the settings in the module.
⚠️ In this case you will always have a 50:50 weight between the original and the variant.
Tracking
To enable the tracking, you need to set the Tracking Page-ID, you will find in your Makaira setup-information. The tracking data is required for machine learning.

Tracking settings
Be aware of the current legal regulations in your target market and set up the cookie banner accordingly.
Checkout the tracking for detailed information.
Development
If you need to modify data stored in OXID or want to add additional document types, please checkout the development section.
Unsupported Features
Makaira adds many features to the cart systems, for which we provide modules that improve the conversion rate.
The connect module supports the main features of Makaira, but as Makaira is a headless system, we do not support all of them. If you want to use more, you are welcome to [improve]((doc:oxid#contribute) the connect module.
Contribute
Your contributions are very welcome, so thank you for participating. There are many ways to contribute:
✋ Submit issues
🚧 Submit pull requests
💬 Discuss ideas with [email protected]
Updated 3 months ago
After the succeful module installation and configuration you can head over to the development section and see how to indiviualize the module.